Wednesday, 25 June 2014

Summer Nail Varnish

The last week before payday can only mean one thing - we've all spent far too much money during the month on beauty products and clothes meaning we have only have a handful of cash left!

We're probably all in the same boat on this one and if your anything like me, you'll be scouring the shops, trying to find any products which your last few pennies will stretch to!

We'll... we're in luck. we're now into Summer so it's the perfect time to make sure your nails are in their best condition. I mean trimmed, filed and perfectly manicured. I myself am a little bit of a nail biter, so I need a couple of weeks prep in order to grow my nails to a suitable size to paint!

In preparation for beautiful hands and feet for the summer, I use the Clarins Hand and Nail Treatment and the Clarins Foot Beauty Treatment Cream. I love Clarins products - not only do they make your skin feel super soft after using them, the smell of the products provide you with the setting of being in a spa. Definitely a splurge product but something you'll use time and time again. The great thing about Clarins products too is that when you buy more than two items, they often give away free gifts which are usually mini versions of the products. These are great as they allow you to try products you've never used before. This is usually how I fall in love with a product and always end up buying the full size!

So, onto some Summer Nail Varnish's which won't break the bank - perfect to brighten your week up before payday! This is just a sample of my favourite Summer colours and brands. The colours I have chosen vary from coral to nude and are from a variety of brands. My favourite brand of nail varnish have to be Essie and Estee Lauder. Whilst these are high end brands, the quality is amazing and leaves you with salon finish nails. They're also super hard wearing, meaning you won't need to reapply regularly.

I have chosen these colours as they'll go with any outfit. They're perfect to either compliment an outfit, or if worn with casual clothes, make a subtle statement.

From left to right, they are

1. Rimmel Salon Pro - Soul Session
2. Estee Lauder - Tempting Melon
3. Ted Baker - This one doesn't seem to have a name!
4. 17 - Supreme Shine - Simply Pink
5. Essie - Fiji

I hope you enjoyed this post. I'm now off the start growing my nails so I can wear some of these beautiful polishes!
SHARE:

Wednesday, 18 June 2014

How I Edit My Blog Photos


Recently a lot of you've been asking what camera and apps I use to edit my photos. Whilst I use my I phone 5 for a number of photos, I'm also lucky that my Dad allows me to borrow his Cannon. He's really into photography so has a load of different cameras and lenses which I borrow!

Choosing Your Background  
Whilst text makes up the main body of the blog, photos draw the readers eye to the article and therefore need to be really engaging.
A lot of beauty bloggers have white furniture which they use as a background - please do not think you need to go out and buy loads of expensive white furniture! It's easy to find some simple yet exciting backgrounds around the home.
When I'm trying to show off a product, I tend to use a white background for no other reason that it makes the product stand out to the reader. Sometimes busy backgrounds can distract from what you're talking about. My top ideas for a great background are:

1. Simple white
2. Grass
3. Plants
4. Pattern quilt cover
5. Into the sky


Turn a Photo Into a Picture
One of my favourite parts of blogging is to get the photo just right! Whilst a white background makes your product stand out, on it's own it's also rather boring so I try to accessorise the photo as much as I can, without cluttering! For example choosing flowers which compliment your product not only look great, but show how much effort has gone into the set up of the photo. My top 5 favourite accessorise are

1. Flowers
2. Candles
3. Fairy lights
4. Glass bottles
5. Other products if out of focus

My top tip is to be careful to show off too many products in one photo - it's great if you do but try to blur them slightly so you're only showing one at a time. You don't need fancy cameras to do this, this can be easily faked using Instagram.


Lighting
It's hard to get the lighting just right when blogging, especially if your only able to work on your blog in the evenings. Again there is a great app which allows you to brighten the light on your photos. I usually use whiteagram but I'm sure there are some similar apps out there which do the same thing.

Editing Using Apps 
If you've read my blog before, you'll notice that I love to add sparkles to my photos! I think it adds something extra and also makes the photo look super pretty! My favourite apps to use are

1. Whiteagram
2. Instagram
3. Afterlight
4. Repix
5. A Beautiful Mess

I don't want this to be a really long blog post but I want to show you the process of one of my images from start to finish and how you can completely change the look of an image.


Whiteagram, Repix, Afterlight, A Beautiful Mess
 
It's great to make our photos look better but be careful not to change the colour too much. If you're reviewing a product we want to know what it actually looks like!

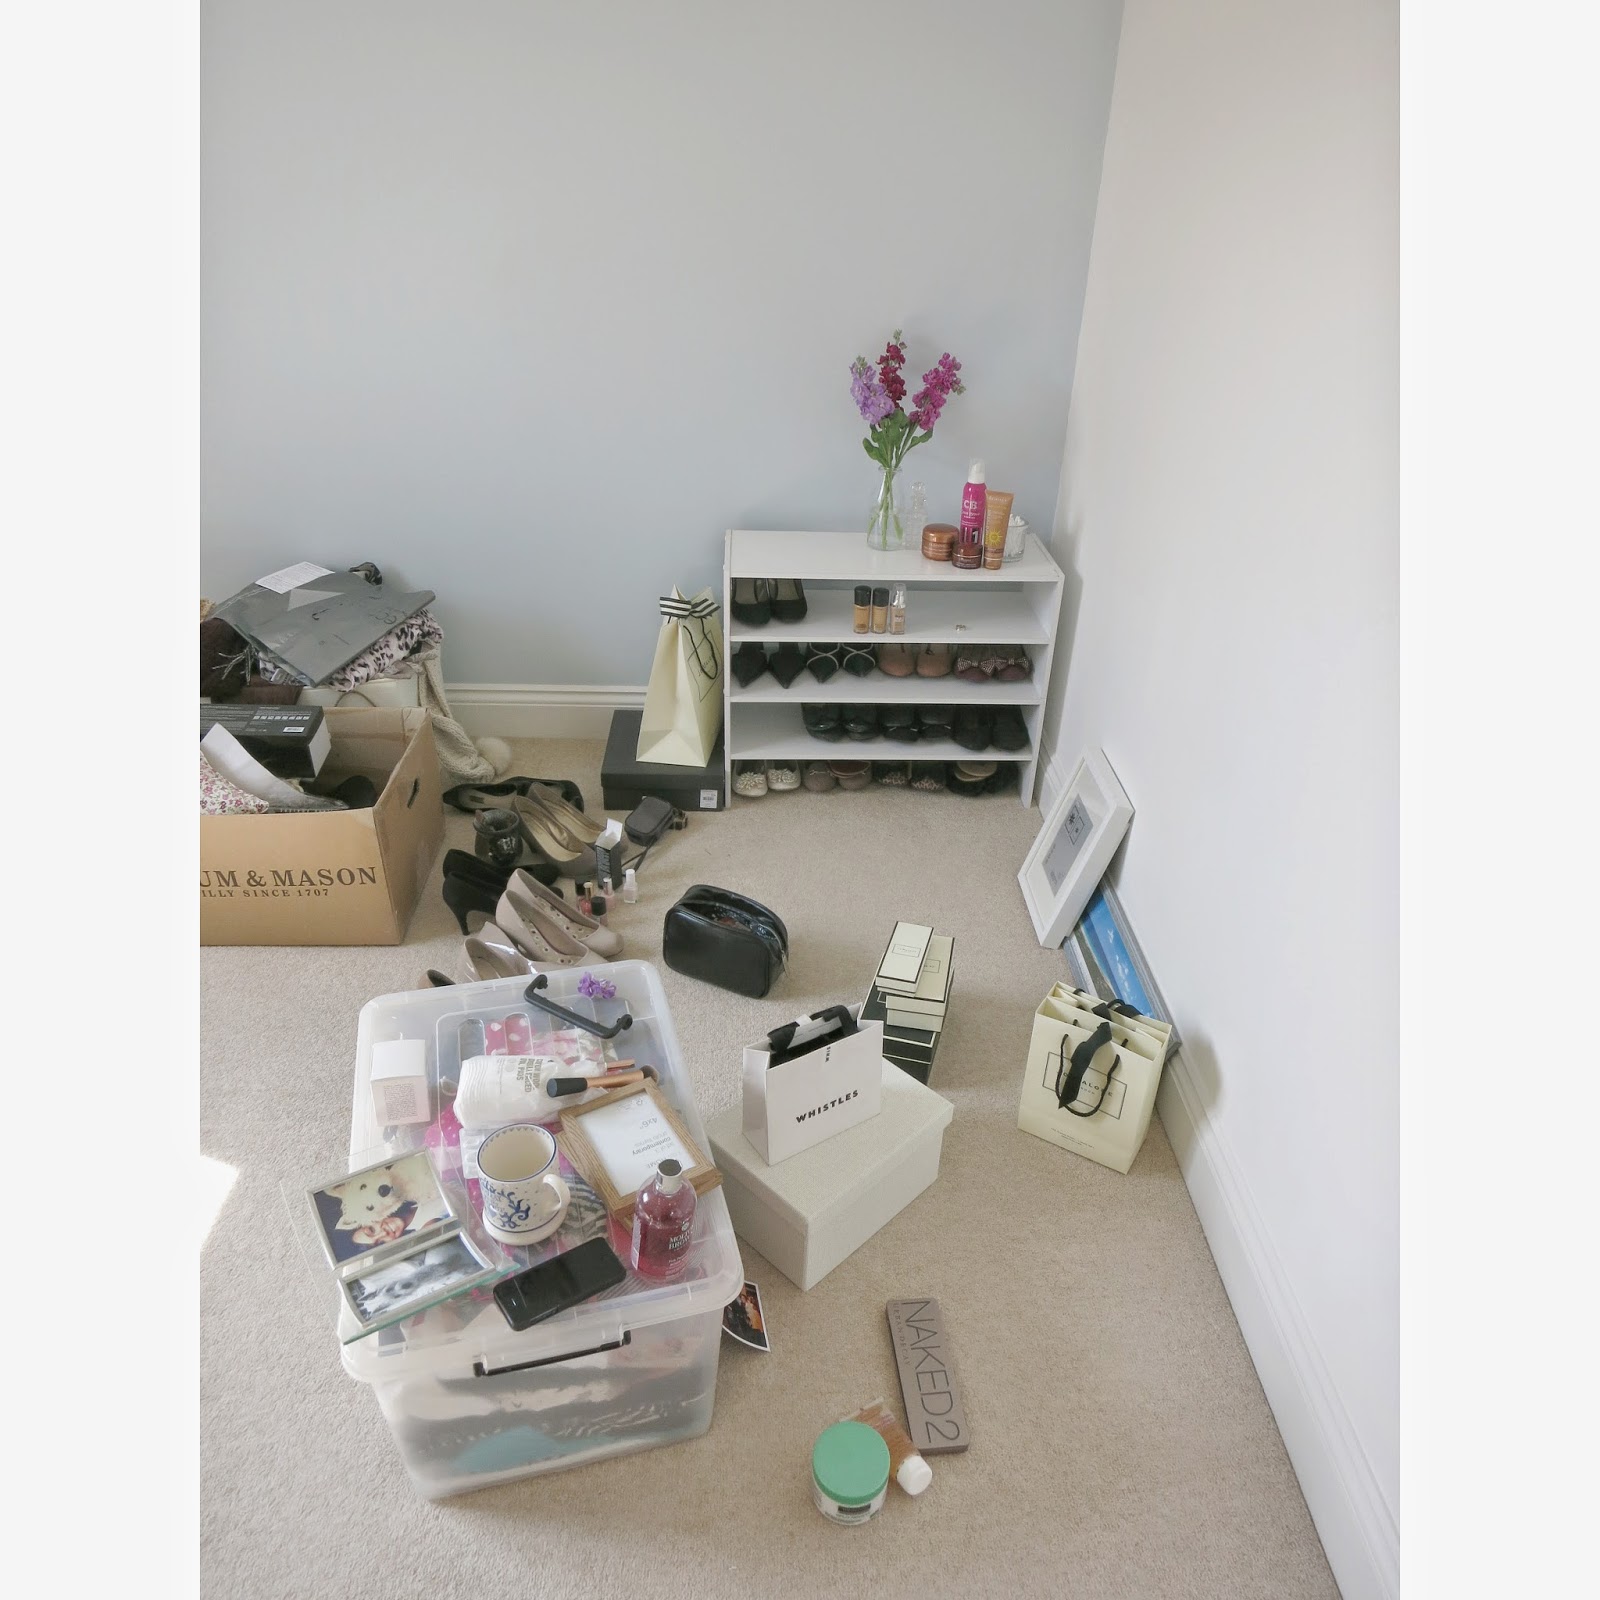
And now for a little glimpse behind the scences of my blogging pics! I mentioned earlier that you don't need to spend loads of money on expensive white furniture. I'm currently in the process of redecorating my dressing room. I bought some shoe shelves from Argos for £11 each and they're just sitting in the room waiting to be put in my new wardrobe. And here's the secret.. Every time I want to take a blogging photo, the shoes all come off, the flowers/fairy lights/candles go on and there you have it... My very own backdrop for blogging! All for £11! Here's a photo of what it looks like behind the camera - the part which you never see!!


I hope this has answered some of the questions you had plus inspired you to take some photos for your blog! With Summer on its way, I can't wait to get out there and take some photos outside!

Happy snapping!!
SHARE:

Tuesday, 17 June 2014

Well we're halfway through June and I'm now writing my May favourites! But better late than never hey! It was hard to chose just a few this month, but these really stood out. I try to do a variety of favourites, makeup, hair, you tuber etc.

Urban Decay Naked Pallette 2
I love all of the naked pallets but this month I have been loving naked 2. For those of you who don't own one (where have you been) there are three options to chose from:

Naked 1- 12 gorgeous bronze shades in a suede case
Naked 2 - 12 neutrals in a tin case
Naked 3 - 12 rose neutrals in a hard tin

The reason why I chose Naked 2 over Naked 1 (I don't have 3) is because I've been on a couple of holidays this month and the tin case provides extra protection whilst travelling. I know what your thinking, do I need to take 12 eyeshadow a on holiday. Well the answer is yes. The naked pallets are all designed to beautifully compliment each other - which means you can mix and match different colours every night if you're on holiday! They do a smaller travel version but the colours are all matt and I like a little bit of a shimmery shade!
My favourite colours in naked 2 are 'chopper' for all over the lid 'busted' for the outer corners and underneath the eyes and 'bootycall' as a brow highlight.


Real Techniques Expert Face Brush
I have really been loving my real techniques expert face brush this month for applying foundation. Although it's much smaller than some of the foundation brushes I have used previously, it's actually great at buffing foundation into the skin - providing an ultra flawless look. When I went from using previous foundations brushes to the expert face brush, not only did I notice the difference but my friends noticed the difference too. I think I purchased this for around £12 (they're usually in boots 3 for 2). £12 for a foundation brush is towards the lower end of the market in comparison to companies such as Mac and Bobbi Brown, but this product is nothing like low end! I have been using this for 4/5 months now and the bristles remain exactly as purchased. I often find with Mac brushes that the brush sheds after a couple of weeks - this doesn't happen with Real Techniques.
I previously used the Real Techniques stippling brush which was a close second favourite but I managed to ruin mine washing it!


Molton Brown Pink Pepper Pod Body Wash
No there's a mouthful! I actually had this as a Christmas present but tried to keep hold of it as long as possible before using it in order to proudly display it in my bathroom (yes I'm that sad!). I love Molton Brown products - from the gorgeous slick packaging to the brightly coloured liquids. The great thing about them is that the scent is so strong that you only need to use a small amount of product.
I have had the pink pepper pod fragrance before and I have to admit it may not be for everyone! It's made from ground pink pepper pods so the scent is spicy! It smooths your skin leaving it hydrated and smelling yummy!
The Molton Brown body washes are prices at around £18 - a high end product but great for a night of pampering. I would recommend people to try this product before buying as whilst this scent may not be got you, they have loads to chose from. I actually double this up as a bubble bath - not sure if i should do that hmmmmmm let me know!


TRESemme Split Remedy Treatment Mask
My hair is extremely dry and I mean split ends on split ends. This has been caused from years of taming my wild hair which GHD's. I wanted to try a cheaper hair product which is not only great for my hair, but that I wouldn't worry about the cost when applying it thickly.
I have used a couple of Tresemme products before and seen great results and the Expert Recovery hair mask did not disappoint! It claims to recover parched, dried out ends and lengths.
I apply to the ends of my hair after washing and leave on for 5-10 minutes before washing. Immediately after washing my hair is noticeably smoother and much more manageable when trying to brush through. Whilst I still have split ends (it didn't work miracles) after a couple of uses they appeared visibly repaired.
I use this 1-2 times a week as a treat to my hair.

Clarins Pure Melt Cleansing Gel
This stands out to me as my number 1 favourite product of May. This seems so much more than a cleansing gel. You put if on your face as a gel, it's then turns into an oil, removing makeup and dirt along the way. When you wash it off, the consistency is much more milky and you'll notice the gel has turned white in colour. Again I use this 1/2 times a week as a treat to my skin. I love the smell of Clarins products, it reminds me of visiting a spa so great for a night of home pampering.


Favourite You Tuber
I spend a lot of time watching You Tube videos!! I have around 10 favourite You Tubers but my favourite of all time and for the month of May is...... Funforloui.

For those of you who havnt watched his channel (you must, must, must, watch it!)  Loui vlogs every single day!! That's like a whole new soap opera but without the drama!

Loui is super down to earth and vlogs his every day life.. You'll mostly find him skateboarding to a coffee shop of hanging out with his friends.. His vlogs also follow him travelling around the world, on meet ups and charity projects. Funforloui is a breathe of fresh air in the world of vlogging. If you haven't seen him.. Click here now! It's great viewing whilst applying your makeup in the morning!
SHARE:

Friday, 13 June 2014

Dress Like A Celeb - Mary Kate & Ashley

Keeping it effortlessly casual

Today two of the most beautiful girls in the world turn 29 - Mary-Kate & Ashley Olsen.

Mary-Kate and Ashley have been in the spotlight since they were just 6 months old! I first heard about them in 1998 - when they filmed two of a kind for Nickelodeon and ever since then I've been in awe of their style and hair! They always look so effortlessly perfect!

To celebrate their birthday, I wanted to recreate some of their recent casual looks. You'll notice that the twins always wear very baggy clothes, creating a boho look. They hair is usually either in lose beach waves, or in a sleek up do.

If you want to recreate their looks above for less, then carry on reading!


Casual Everyday

I love this look - mostly because it's full of stuff which we already have at home! Meaning that it makes this look super easy to create! Th is outfit would be great for shopping, trips to the cinema or even a first date. It's smart casual with a boho edge.

Shop The Look

Sunglasses - Topshop Alice Metal Aviator £10
Watch - River Island Black Screw Detail Bracelet Watch £28
Shoes - Office Garland Strappy Block Heel £60
Jeans - Topshop Zip Ankle Jamie Jeans £40
Shirt - Topshop Crinkle Oversized Shirt £30
Ring - Accessorize Tia Turquoise Diamante Ring £10
Bag - Warehouse Leather Metal Keepers Tote £90


Evening Boho

Mary-Kate and Ashley look great whatever they're doing - in this case, walking their dog! I love the floaty black midi teamed with detailed sandals and an everyday tote. I was unable to find a cheap alternative to the handbag, so I've gone with one from my wish list instead!

Shop The Look

Sunglasses - ASOS Oversized 70s Sunglasses £7.50
Black Midi Skirt - Miss Selfridge Organza Skirt £39
Michael Kors Bag - Selma Cros-effect Tote £345
Shirt - Oasis The Crissy Shirt £30
Sandals - River Island Black Chain T Bar Sandals - £32

I hope you all enjoy this blog post and let me know if you try to recreate the looks! Also send me any celeb ideas for next week's 'Dress Like a Celeb'.
SHARE:

Wednesday, 11 June 2014

My Everday Foundations

Finding the right foundation for your skin type and colour can be a time consuming process, however get it right and you won't have the dreaded orange mark on your jawline!

Once I find a foundation that suits me, I tend to stick with it. That's why I've been using the same foundation for a number if years. Don't get me wrong, I do occasionally mix it up and try new products, but for me, nothing has come close to the foundations below.

Everyday Foundation

I work in an office Monday to Friday 9-5 so maintaining a glowy tan is near enough impossible. That's why I chose a much paler lighter coverage foundation during the week.
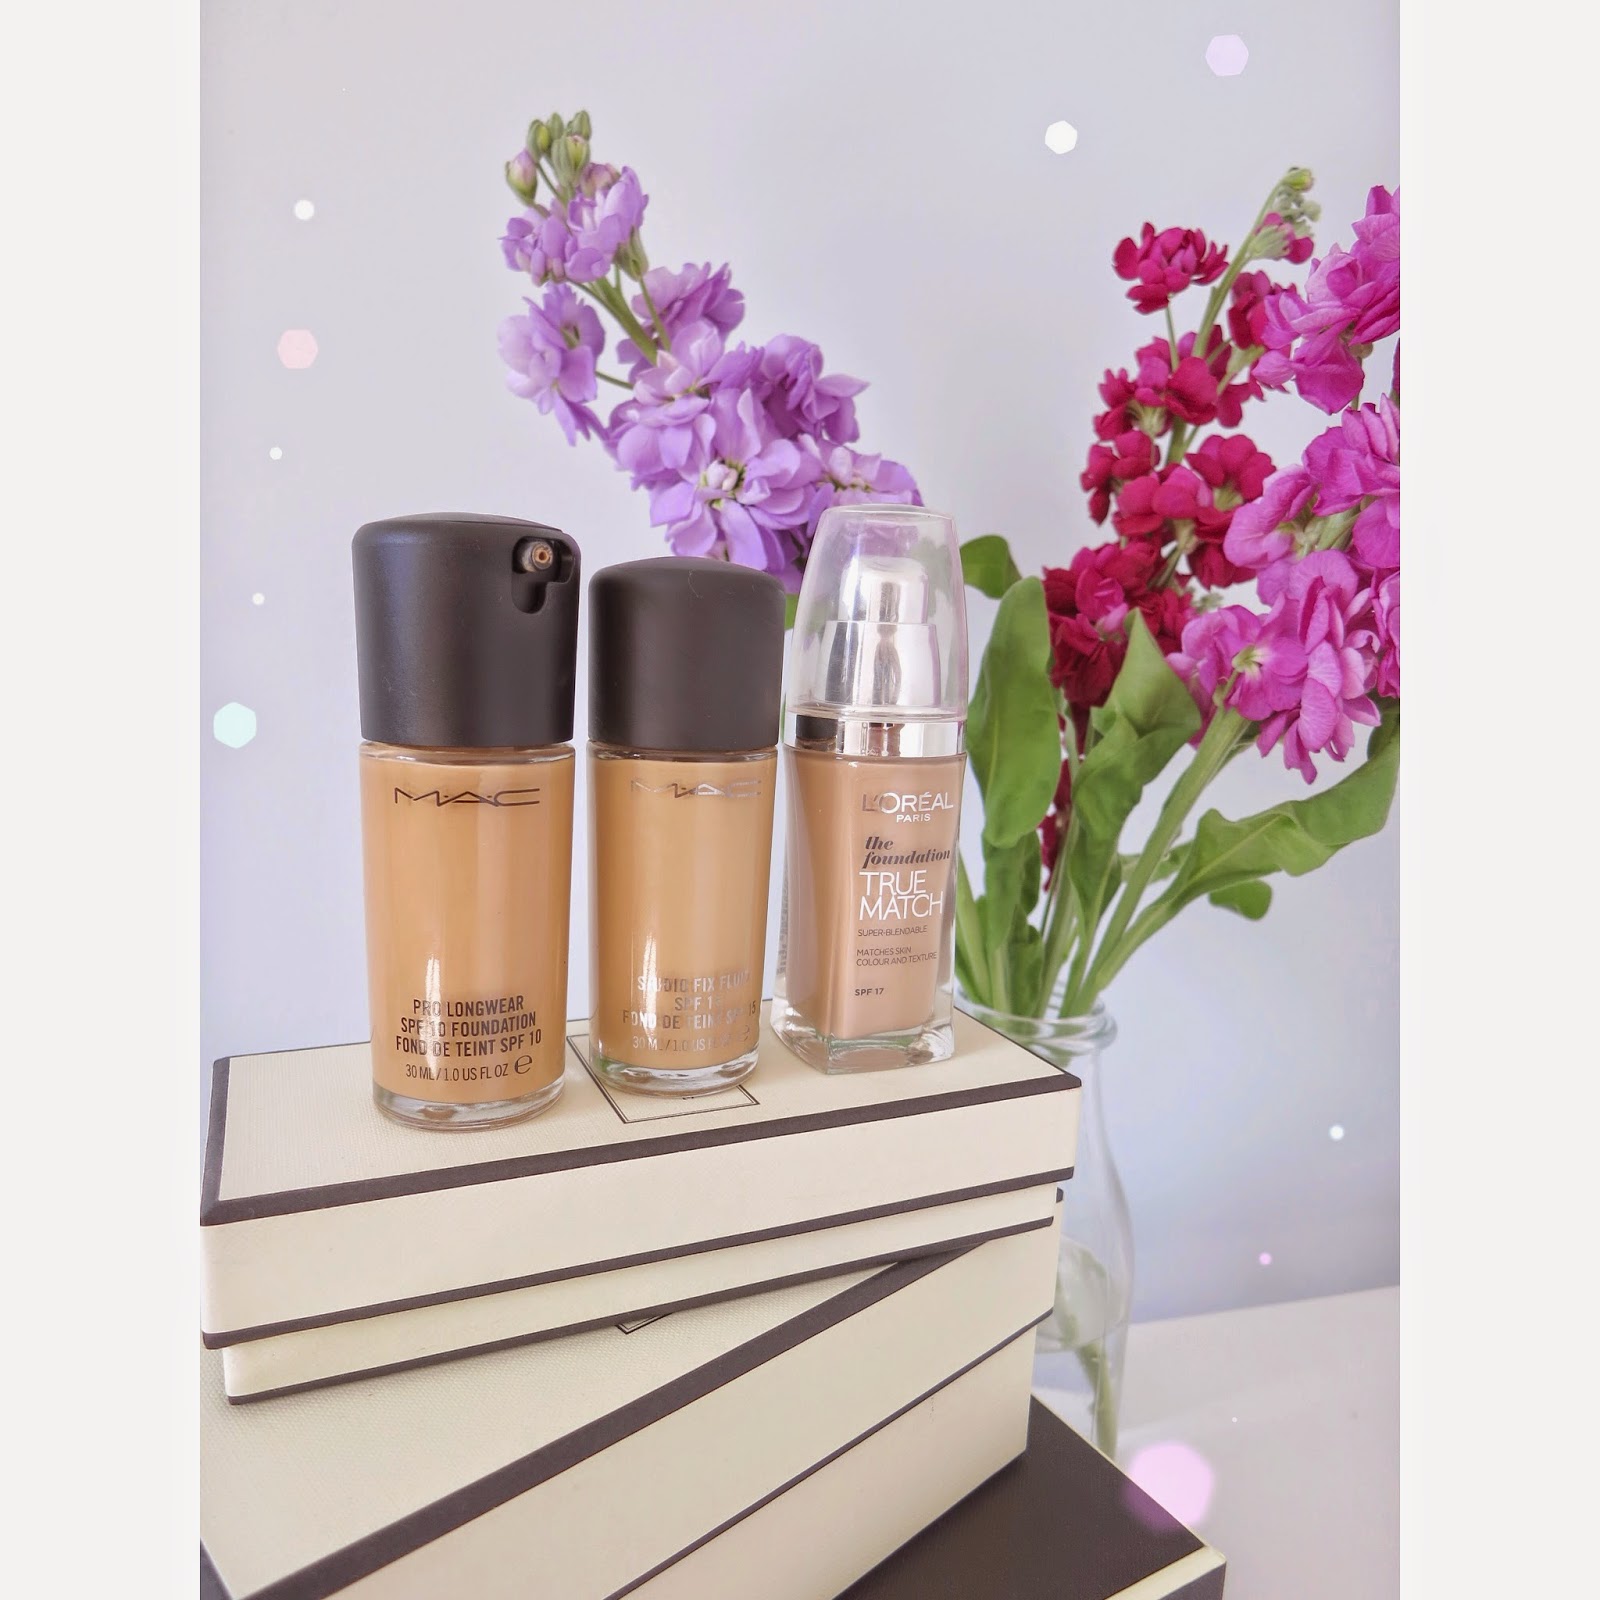
I swear by Loreal True Match foundation (in the colour sand) and have been using it for years now. The light coverage means my skin is able to breathe during the day plus in a professional job, I don't want to be caked in foundation. It smooths the skin leaving my skin looking natural and acts as a great base for bronzer and powder.
The only negative about this product is that by 5 the foundation has started to wear off. I'm not someone who reapplies makeup during the day - I much prefer to put it on in the morning and leave it.

Evening Foundation

Up until last week I had one 'best' foundation. You girls know what I mean by best - you buy a product or item of clothing and keep it for 'best'.. well I do the same with foundation.
I use Studio Fix Fluid in NC35 - it's the perfect colour for me when I've fake tanned. It provides a much thicker coverage which means it stays on your face until you remove it! It's great for nights out as you know you won't need to be touching it up all evening - there's nothing worse than trying to carry a glass bottle of foundation in your clutch on a night out! This gives my skin a matt finish without making my pores look clogged.

Because I love the results from the Mac foundation so much, I wanted to try a paler colour for everyday use at work. I visited the Mac counter at my local department store (Jarrolds Norwich) and was advised that Pro Longwear offers the same lasting finish but a lighter coverage. I bought it in the colour NC40 - much darker than the Studio Fix I know but the makeup artist mentioned that Pro Longwear needs to be worked into the skin, so a darker colour will actually appear much lighter on the skin. I also took away a tester for Pro Longwear in a lighter colour for work - I'll let you know how I get on with this.

I apply all of my foundations with the Real Techniques Expert Face Brush. I've also been a lover of the Stippling brush before - but my current fav is the Expert Face Brush.

If you have any recommendations for an everyday foundations which lasts all day, please comment in the box below.


SHARE:

Tuesday, 10 June 2014

Garnier Micellar Water

A skincare product which i've been loving recently is the Garnier Micellar Cleansing Water - A water based cleanser which claims to remove makeup, sooth the feel of skin and hydrate.

So, how does it work? Garnier Micellar Cleansing Water contains micelles which act like magnets, gently lifting away makeup and impurities from the skin. In other words a quick and easy way to remove makeup without using a naughty face wipe, which can be really harsh on your skin and clog pores.

Most companies sell something similar to this  product - I chose Garnier purely because it was on offer for £2.50 in Tesco. £2.50 for a product which claims to remove all makeup plus comes in a really cute bottle seemed like a steal! I also like to give my skin a break from my usual skincare routine which you can see by clicking here Daily Skincare Routine.

I've been using the water to cleanse my skin twice daily - once in the morning and once in the evening. Surprisingly just a small amount on two cotton pads removes all of my makup. I say surprisingly because I wear a lot of mascara and using a water based product to remove mascara without smudging it all down my face just seemed impossible!!

It's designed for sensitive skin and noticibly feels much lighter than a cream based cleanser. So if you usually find cream based products bring you out in spots, or you just want a change up in your skincare routine, I would definitely recommended trying it.

A couple of points to mention about this product is that once bottle claims to last 200 uses or 100 days if your using it twice daily. So far mines gone down a fair bit and I've only been using it for the past month. This is probably down to the fact I'm applying more than I should be.
Secondly if you travel around a lot this product will be perfect for you. I would recommend a moisturiser after use but iv used it without and have not seen any difference in my skin. The only negative about the product is I've doing the lid often leaks. So if your travelling about, make sure you tape it up to avoid spillages!

If you've tried out any other similar products. Please let me know in the comments box below as I'd love to try them out.

SHARE:

Sunday, 1 June 2014

Dress Like a Celeb - Caroline Flack

When I decided to start this series of blog posts, there was no doubt as to which celeb I would start with...Caroline Flack - 34 year old TV presenter from beautiful Norfolk (which just so happens to be where I live!)

I've been a massive fan of Caroline's style since her very early days on TMI and I'm a celeb get me out of here now (where Caroline teamed cute little dresses with wellies). She's queen of the highstreet which is great for us, as we get to steal her style at affordable prices! 

Caroline knows exactly what style suits her and adapts to the occasion. You'll mostly see her wearing playsuits, cute little shorts and anything with a collar!

With festival season fastly approaching, I have chosen my 3 favourite styles which Caroline has worn in previous years and recreated the look with this seasons must haves!


My favourite Caroline Festival Styles - Festival Chic - Rock Chick - Effortlessly Glam


Festival Chic

This is my favourite look and the shops have some great dupes in at the moment. I'm unable to find a printed mac like this but have used the scarf to bring in some leopard print. Scarves are great for festivals and are a great way to add some colour to a simple outfit.

Shop The Look

Boots - Office Free Fish Sarasa Comet Boot £35
Glasses - Asos Karl Lanerfeld Hexagonal Sunglasses £125
Bag - Asos Leather Double Compartment Cross Body Bag £45
Shirt - River Island Embroided Hem Shirt £30
Shorts - River Island Scallop He, Shorts £20
Hat - Miss Selfridge Black Felt Floppy Hat £28
Scarf- Oasis Animal Leopard £6


 Rock Chick

If you're on a budget then rock chick is the best look to recreate as it uses a few staples which alot of people will already have. Denim shorts, a leather jacket and a plain white tea.Carolines brightened up the look with an orange printed scarf, but any bright colours would be great for making a bold statement.

Shop The Look

Top - Topshop
Bag - Topshop SmartCrossbody Bag £34
Glasses - Warehouse D Frame Sunglasses £16
Scarf - Forever 21 £4.90
Boots - ASOS Revoir Leather Chelsea Ankle Boots £40
Jacket - Miss Selfridge Faux Leather Biker Jacket £52
Shorts - Topshop Bright Blue Mom Shorts £30


Effortlessly Glam

Caroline mixes highstreet with designer and always manages to look effortlessly glam. To get the look, mix casual denim playsuits with cute tan wedges. I have these wedges and they are my summer must haves. Not only do they go with every outfit, but they are THE comfiest pair of heels I own. Caroline wears this outfit with lose wavy hair an minimal makeup - great for the final day of a festival.

Shop The Look

Wedges - Topshop Wizard Multistrap Wedges £45
Playsuit - Miss Selfridge Light Wash Denim Playsuit £30
Bag - Warehouse Hardware Detail Crossbody £24
Glasses - ASOS Bridge Detail Cat Eye Sunglasses with Metal Arms £12
Coat - New Look Khaki Lightweight Hooded Foldway Parka £17.99

I hope you enjoyed this post - I have to admit, this has been my favourite post to write. Check back on my blog next week for the next edition of 'Dress Like a Celeb For Less' and comment below if you have any celeb looks you'd like me to try and recreate.
SHARE:
© Flutterbydott.. All rights reserved.
Blogger Templates by pipdig